- Match report
- Match report
- Line-up
Follow @soccerdonna
![]() Soccerdonna-News auf Twitter
Soccerdonna-News auf Twitter
2:8
(0:4)
-
A-League Women - 11. Match day - 13.02.2022 - 06:05
Moreton Daily Stadium - 1.000 Spectators - Referee: Rachel Mitchenson


 0:3
0:3

|
 5:0
5:0

|
 0:4
0:4

|
 2:8
2:8

|
 0:1
0:1

|
Formation
| Line-up: Brisbane Roar | ||
|---|---|---|
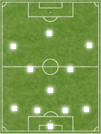 4-3-3 offensively-minded:
Mia Bailey - Jamilla Rankin, Jessie Rasschaert, Natalie Tathem - Katrina Gorry, Mariel Hecher, Ayesha Norrie, Hollie Palmer - Shea Connors, Larissa Crummer, Anna Margraf Coach: Garrath McPherson |
||
| ø-Age starting11: 24.4 years ø-MV starting11: 11.364 € | ||
| Line-up: Adelaide United | ||
|---|---|---|
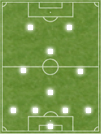 4-4-2:
Annalee Grove - Emily Hodgson, Isabel Hodgson, Matilda McNamara, Kayla Sharples - Emily Condon, Dylan Holmes, Reona Omiya, Nanako Sasaki - Chelsie Dawber, Fiona Worts Coach: Adrian Stenta |
||
| ø-Age starting11: 23.6 years ø-MV starting11: 7.273 € | ||
Goals
| Brisbane Roar | ||
|---|---|---|
| 1:6 |
Connors 59. min. Left-foot shot, 4. Saisontor Assist: Gorry, Pass, 1. Vorlage |
|
| 2:8 |
Connors 80. min. Tap-in, 5. Saisontor - |
|
| Adelaide United | ||
|---|---|---|
| 0:1 |
Dawber 13. min. Right-foot shot, 8. Saisontor Assist: Worts, 3. Vorlage |
|
| 0:2 |
Palmer 23. min. Own goal - |
|
| 0:3 |
Worts 33. min. Tap-in, 5. Saisontor - |
|
| 0:4 |
Worts 43. min. Left-foot shot, 6. Saisontor Assist: Dawber, Cross, 3. Vorlage |
|
| 0:5 |
McNamara 55. min. Header goal, 2. Saisontor Assist: Condon, Corner, 2. Vorlage |
|
| 0:6 |
Worts 57. min. Left-foot shot, 7. Saisontor Assist: Holmes, Cross, 1. Vorlage |
|
| 1:7 |
Worts 64. min. Solo run, 8. Saisontor Assist: Condon, Pass, 3. Vorlage |
|
| 1:8 |
Worts 74. min. Left-foot shot, 9. Saisontor - |
|
Substitutions
| Brisbane Roar | |||
|---|---|---|---|
|
Midfield, 46. min. Tactic |
Clough Defence |
||
|
Goalkeeper, 68. min. Injury |
Shuttleworth Goalkeeper |
||
|
Defence, 75. min. Tactic |
McElligott Striker |
||
|
Midfield, 75. min. Tactic |
Kitano Midfield |
||
| Adelaide United | |||
|---|---|---|---|
|
Midfield, 74. min. Tactic |
Beaumont Striker |
||
|
Defence, 74. min. Tactic |
Stanbury Defence |
||
|
Defence, 83. min. Tactic |
Varley Defence |
||
|
Midfield, 83. min. Tactic |
Evans Striker |
||
|
Goalkeeper, 90. + 3 min. Tactic |
Templeman Goalkeeper |
||
Cards
| Brisbane Roar | ||
|---|---|---|
 |
Connors
39. min., 3. yellow card, Foul |
|
| Adelaide United | ||
|---|---|---|
| none |